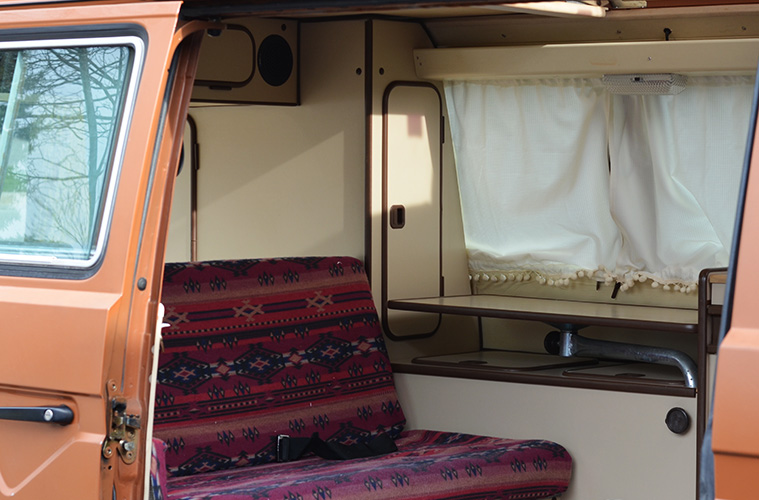
I love the 1980s. Coleman and I came into existence that decade (thanks, parents!), and neon wind suits became a thing (thanks, pop culture). But the stock Westfalia curtains that Volkswagen outfitted its campers with in the early ‘80s aren’t so hot. The original curtain fabric is crunchy, itchy looking, and makes the van feel dark inside—even when it’s sunshiny outside.
Making new Westfalia curtains was intimidating at first. At a glance, it looks like there are a million screws to undo—the fabric is often bolted into the walls. The reality is, you just need one Phillips head screwdriver (or two, if you’ve convinced someone who really loves you to help) and a bit of patience.

We started by removing every screw and taking off each curtain panel.
A sneaky tip: label your curtain panels (safety pins, a pen, and some lined paper are your friends), so you know exactly which one goes back where. IE. “Driver’s seat #1,” “Driver’s seat 2,” etc. We unscrewed each screw, removed the original curtain panel, and then re-screwed each one back into its place, so as not to misplace them during the sewing part inside.

Once you’ve got all of the curtain panels removed (our 1983 Westy had eight panels total), lay each one flat, and measure (twice!) the length and width. They vary in size, despite looking like they’re all the same.

After you have the initial measurements down, add four inches to each length total. These extra inches will account for the seam pocket that needs to be sewed. (This is where the curtain rod/bottom wire will be fed through.)
Once you’ve measured your original curtains, you’re ready to cut! We used pinking sheers to stop future fraying before sewing the hem and the two-inch top and bottom seam pockets.

Finish each panel’s edge by folding the fabric over one-fourth; now, sew. Next, on the bottom and top parts of each panel, fold fabric one-and-a-half inches over, and sew along from side to side. This is to create the pocket where you’ll feed the curtain over the rod. Whatever you do, don’t sew the pocket shut. That will be a) useless and b) annoying to take out the stitches.
In the end, we made nine curtain panels total—four on the back driver’s side, two on the rear, two on the back passengers side, and one extra long one with magnetics hidden in the fabric (for easy morning and night removal) to cover over the sliding door’s window.

Despite Coleman’s visceral reaction to the word “pom-pom,” my mother and I voted him out and sewed cream-coloured dangly bits to the bottom of each curtain panel. They add a touch of texture that makes me feel warm and fuzzy inside. Who doesn’t love a good pom? (Other than Coleman.)

After hanging each new curtain, our Westy’s interior felt instantly fresh and clean—the same feeling you get after painting. Or showering.
Now, how long will these white curtains stay white? We’re taking bets in the comments below.